We may earn money or products from the companies mentioned in this post.
Photography or videography is an art that also requires talent alongside the best equipment which satisfyingly suits your needs. One example of its equipment is green screen lighting.

The best green screen lights ensure you obtain the most pleasing results for photo and video editing. Today, many green screen lighting kits are available in the market, that sometimes, selecting the best can be quite challenging.
If you plan to get one, the guide below can give you detailed information. It includes the best to purchase, how to set up, repair, maintenance, and more. Carry on reading!
The Top Ten Best Green Screen Lighting in 2021 (Product Review)
Are you looking for the best choice when you buy a green screen lighting? The following is a compilation of the top ten best green screen lighting. These products can help you achieve the ideal lighting setup for green screens during your shoots.
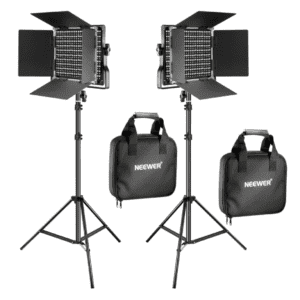
1. Neewer 2-Piece Bi-Color 660 LED Video Light
The Neewer 2-Piece Bi-color 660 LED Video Light is a versatile option for your studio that gives the best performance. This light is a perfect choice since its green-screen lighting effects create beautiful scenes that you will love.
Features
- It has rechargeable and long-lasting batteries, and each can last up to 90 minutes.
- It comes with a light stand and an AC adaptor.
- Made with top-quality metal
- Features two light diffusers
Pros
- Easy to utilize and move around
- Suitable for both beginners and professionals
- Known for its brightness and superior performance
- Cost-efficient
Cons
- Not all users get much satisfaction with its battery life.
Why You Should Buy This Product
With the Neewer 2-Piece Bi-color 660 LED Video Light, you can conveniently work on your videography or photography project since it is easy to move from place to place and provides remarkable performance.
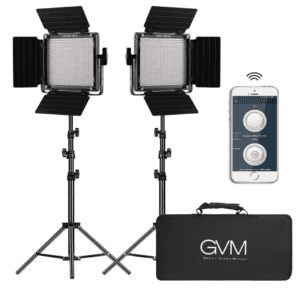
2. GVM 2 Pack LED Video Lighting Kit
Are you working on a budget? This product is one of the best affordable options in the market without compromising its performance. Besides this, it also provides a green screen lighting app control that best suits your photo and video light production.
Features
- Easy to install
- The lights are not heavy.
- Rechargeable battery
- It comes with app control.
- Well-packaged box
Pros
- Budget-friendly
- Ease of use and installation
- Preferable to both photography and videography
- It is perfect for both newbies and experts.
Cons
- The stand needs to be more sturdy.
Why You Should Use This Product
It is an affordable product that gives incredible lighting performance. If you need an application control on lights, then the GVM 2 Pack LED Video Lighting Kit is for you.
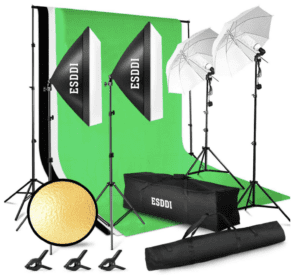
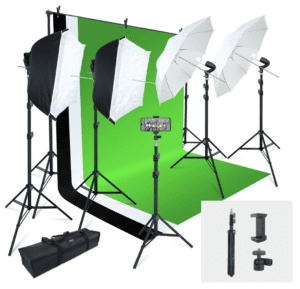
3. ESDDI Lighting Kit with Background Support System
This ESDDI Lighting Kit is best when you do portrait shooting because it makes a soft and feather-light effect. It even comes with a sizeable carry-along bag and has a lovely green screen lighting setup for ease.
Features
- It has an adjustable stand.
- The user can adjust the stand’s length from 0.68 m to 2.6 m
- The softbox window is temperature-resistant.
- Made of lightweight and easy to fold and unfold material.
Pros
- Easy installation
- It has a flexible and compact size that fits any space.
- Best for both beginners and professionals
Cons
- The light units are not that reliable, and they may even catch fire.
Why You Should Buy This Product
The ESDDI Lighting Kit with Background Support System is a versatile, compact lighting kit. It suits all your photography and videography needs.
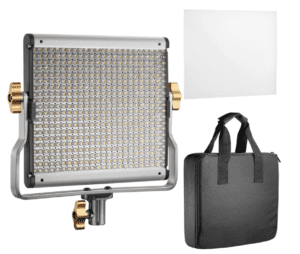
4. Neewer Dimmable Bi-Color LED Video Light
Neewer offers the Dimmable Bi-Color LED Video Light, which is suitable for people who are into professional video production. Moreover, lighting a green screen using this product makes the setting more beautiful and helps you produce excellent content.
Features
- The batteries are rechargeable and have good battery life.
- It comes with a storage bag.
- Features two sets of LED lights
- Made of top-quality metal
- Features durability
Pros
- Easily switch between two light temperatures.
- It is suitable for remote jobs.
- It is affordable.
- Known for its incredible performance
Cons
- The bag that comes with the light kit is too small to hold all the lights and accessories effectively.
Why You Should Buy This Product
It is a budget-friendly green screen kit. Each component of the Neewer Dimmable Bi-Color LED Video Light is firmly and tightly attached, making this lighting for green screens sturdy.
5. Linco Lincostore Photo Video Studio Light Kit
Made of durable and heavy-duty construction, the Linco Lincostore Photo Video Studio Light Kit is perfect for indoor and outdoor settings. It also contains an elastic pocket that puts the light source at an optimal point, which offers zero light loss.
Features
- The product is sturdy enough for both indoor and outdoor.
- Features a V-shaped handle for grip and uncomplicated adjustments
- It comes with a waterproof carrying bag.
- Includes an umbrella reflector created from translucent fabric
Pros
- It is effortless to set up.
- Affordable
- Built with lightweight materials
- It has a compact design.
Cons
- The softboxes are small and frail, so they can’t hold the background effectively.
Why You Should Buy This Product
If you want digital studio equipment that offers more than just a green screen with lights, this product is for you.
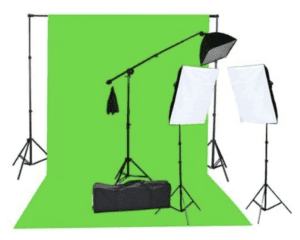
6. Fancierstudio 2000 Watt Lighting Kit
When you mix the Fancierstudio 2000 Watt Lighting Kit with excellent apps or software, your production results will always turn out great. It does not matter whether you are utilizing this green screen lighting at home or in the studio. Additionally, it eradicates most video producers’ problems, such as green screen light twitch.
Features
- You can connect this lighting kit with software.
- These are fluorescent lights.
- Made of top-quality material
- With a durable stand that is enough to hold the lights comfortably
Pros
- Cost-efficient
- Good for remote jobs
- Recognized for its top performance
Cons
- The screws are not sturdy and fastened enough.
Why You Should Buy This Product
Are you looking for a lighting kit that enhances the quality of your video production? This product is one great choice that also works with any software and apps.
7. Dazzne Bi-Color LED Video Light
This Bi-Color LED Video Light by Dazzne can deliver an outcome that fits your every expectation. If your video production line and interest focus on small projects like lighting a green screen in a small room, then get this video light.
Features
- Easy for mobility and handling
- Features bi-color
- Ideal for small video projects
- It has a plastic look and feels.
Pros
- Easy setup
- It has a long cable.
- Easy to operate and utilize
Cons
- The lighting kit does not come with a carrying or storage bag.
Why You Should Buy This Product
Since this product’s light is bi-color, it allows easy adjustment of the color temperature according to your preference and needs.
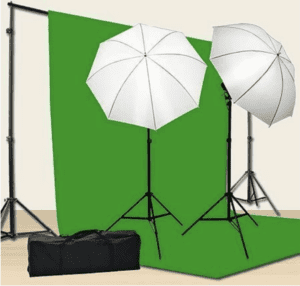
8. Chromakey Green Screen Lighting Kit
The Chromakey Green Screen Lighting Kit offers an incredible view with reliable umbrellas that help diffuse the light. It comes with a stand that lets the user do the setup task in a few minutes.
Features
- The lights’ design matches standard outlets.
- The sturdy stand improves the setup.
- It comes with two 4500 watt 5500k bulbs.
Pros
- It is perfect for streaming.
- It is easy to assemble and disassemble.
- A reliable and affordable light kit
Cons
- The instructions included in the kit are not that clear.
Why You Should Buy This Product
If you want an ideal light for both photography and videography, this kit is a perfect choice. You can easily set it up and disassemble it, making this product one of your best options.
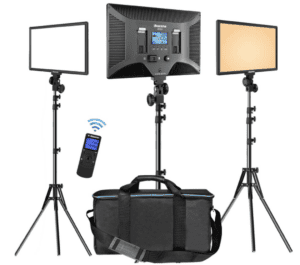
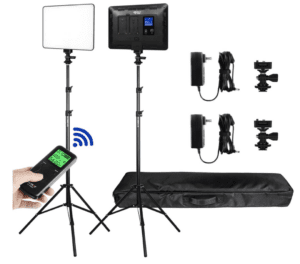
9. VILTROX LED Panel Light with Stand Kit
Do you want a light kit that is basic but unique at the same time? Look no further. This product enhances your studio production performance by giving top-quality lighting.
Features
- Features bright lights
- Guarantees stability
- It comes with a plastic stand.
- A versatile lighting kit
Pros
- Provides top performance
- It is affordable.
- The brightness and temperature are adjustable.
Cons
- The lighting kit does not come with batteries, so you have to buy one.
Why You Should Buy This Product
This lighting kit guarantees versatility, which is a perfect option for you. Additionally, the remote that comes with it works well.
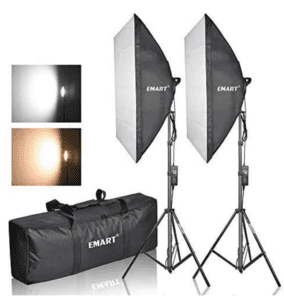
10. Emart Photography Softbox Lighting Kit
Although most Emart Photography Softbox Lighting Kit components are plastic, it does not compromise its durability. When you use and handle it correctly, it is durable enough to last for a long course.
Features
- Made of plastic materials
- It has a long power cable.
- Durable
- Has top-quality case and packaging
Pros
- The brightness is easy to adjust.
- It guarantees bright lights.
- Budget-friendly
Cons
- The installation may be pretty tricky.
Why You Should Buy This Product
When you prefer a plastic lighting kit that offers excellent performance, this budget-friendly choice may fit your requirements.
Relevant Information: How to Set Up Green Screen Lighting
Do you want to know how to light green screens properly? Lighting for a green screen is pretty straightforward. However, it is best to watch out for a few factors because bad lighting can lead to serious editing issues.
The following are some steps to help answer your question. It includes how to light green screens and the best way to light a green screen with ease and convenience.
Step 1: Set Up the Equipment for the Green Screen
Get your green screen lighting kit situated first, whether it is a cheap one or something most professionals use. Smoothen out the material if you have a paper or fabric green screen. Then, start doing the setup like having a 3-point lighting green screen.
Avoiding any reflective material in the shot is a good rule of thumb. Hence, you must keep tabs on what props are necessary. This way, you can adjust your green screen room set up and take a shot for it.
Step 2: Have Similar Lights
Ensure to obtain and utilize the same lights on your production. To know how to light a green screen, keep in mind that having different lights result in uneven color balance. It is because other lights have a color temperature variation.
Step 3: Light Your Subject First
After ensuring that lights and things needed for the setup are available, you are now ready to get the right shade. However, before you concentrate on the green screen itself, make sure to light the subjects properly.
Generally, the subject must be about eight feet away from the green screen. The following lights are what you need to light your subjects effectively:
- Key light – The key light is the primary light source for your model. It should fit wherever the light source would usually be.
- Backlight – It is the backlight that makes a soft halo effect in the subject’s hair. The backlit green screen usage is mostly there when your model needs to be inside a studio setting.
- Fill light – This light makes the ambiance in the scene and helps soften shadows built by the key light.
Step 4: Light the Green Screen
When you finish setting up the correct lighting for your subject, place the lights to focus on the green screen. Every source of illumination must have the same distance from each other and at similar angles. This practice is the best technique to ensure even lighting.
Step 5: Get Correct Exposure for the Green Screen
Finally, you now want to check your camera monitor for the exposure and how much light it takes in. You may want to have less brightness than usual to not include colors outside of the green.
Green Screen Lighting Maintenance
One of the green screen lighting tips that we recommend is proper maintenance. When you maintain your green screen lighting correctly, you can avoid further problems and help its life expectancy last longer. Here are five considerations to keep your green screen lighting in good condition:
- During unboxing, avoid cutting the box deep to prevent any damage to the lighting kit’s components.
- Make sure to charge the batteries before and after every use.
- Ensure that the screws that link each light component are not very tight. It is to avoid the probability of damage and encourage the ease of disassembling it after use.
- Do not carelessly move around with the lighting kit without properly packing it inside its storage bag.
- Avoid purchasing the parts or components of the green screen lighting from unrecognized sellers or stores.
How to Fix Green Screen Lighting
There are times that when lighting green screens, you can’t avoid some mistakes. It may lead to inconvenience during photo or video production. Here’s the list of some errors when lighting a green screen and solutions to fix these problems.
-
Uneven Lights for the Green Screen
The unevenly lit green screen makes the Chroma Key lighting process difficult. It is because there are still light and dark sections in the background.
Solution: Try adding lights intended for the green screen or the so-called spotlight green screen setup to even out everything. This scenario is proof that a Gaffer is essential because they design the green screen lighting setup diagram. It also executes the lighting plan on set.
-
Presence of Shadows on the Green Screen
Shadows make the process of lighting for the chroma key challenging in post-production. It casts dark areas on the green screen. These shadows look similar to your subject’s dark portions, which is challenging to distinguish.
Solution: To lessen the shadows, move your subject away from the green screen background. Also, avoid utilizing a single light or harsh frontal lighting. You may add a green screen backlight placed behind the subject to lighten up the dark areas.
-
Motion Blur
Whether you’re doing DIY green screen lighting or in a studio setup, motion blur is a big issue concerning green screen productions. It is significantly burdensome to repair blurs in post-production.
Solution: To avoid motion blur, let your subject move slowly. On the other hand, if it requires fast movements, you can utilize a higher shutter speed to prevent motion blurs.
Buying Guide: What to Consider in Choosing Green Screen Lighting
When finding a green screen lighting kit to buy, there are vital factors to consider. The following are necessary elements that you must take into account.
-
Budget
There are many green screen lighting kits on the market, and their prices vary depending on the brand. For example, if you want to purchase the Christmas lights green screen, make sure to have a particular amount in mind. It will help you decide how much you’re willing to pay, especially if you are on a specific budget.
-
Reliability
For the reliability and longevity of the product that you will buy, look for the brands made of top-quality metal. You will not get scared of possible damage from unfavorable weather conditions or accidental drops.
-
Performance
Understand the kind of project you are doing when searching for the right green screen lighting to suit your needs. We provided a list of the best green lighting products in this article earlier to help you decide.
Frequently Asked Questions
-
What is a green screen application?
The green screen application is a useful program typically used by photographers, videographers, and filmmakers to construct unique backgrounds. Some examples of the best green screen apps are Chromavid, Chromatic Camera, Green Screener, KineMaster, and PowerDirector. These applications function well with Android, iOS, Mac, and Windows.
-
Are there any technologies to key out backgrounds from a video without the use of green screens?
Yes, there are available applications and software to key out your background from a video without a green screen. You can perform the keys using light information, color information, and more with the software, such as Adobe After Effects. Rotoscoping is also a method that you can use to key out objects manually.
-
How does one use a green screen effectively in photography?
You can refer to the following tips to utilize green screens in photography effectively and efficiently:
- Ensure that your green screen is wrinkle-free
- Avoid light spill
- Check if all the model’s parts are on the green screen.
- Match the lighting with the new background
- Utilize Chroma Key software
-
Is it feasible to replace the green screen with another solid color?
If you do not have a chroma key setup or no green and blue screen, there are other working methods with what you have. When doing digital still photography, gray, black, and white seamless backdrops are the popular green screen alternatives.
-
Why did the movie industry switch from blue screen to green screen for special effects?
The RKO Radio Pictures production teams created blue screens in the late 1930s and first made its way onto film in 1940. As time passed, blue screens’ utilization evolved and resulted in green screens.
It was necessary since the blue’s intensity in the blue chroma screen was very close to the neon green ones. Then, it eventually led us to the familiar green screen we have now.
Conclusion
The green screen lighting and shooting process are not that difficult. Remember to stay away from complicated practices and time-wasting to obtain your desired results. We hope this guide gives you enough information in choosing the best green screen lighting kit that fits your budget and needs. Please share below what green screen lighting kit you got!
